
How to Sell Online Courses From Your Own Website
You’ve got knowledge people would pay for, and maybe the course is even recorded already. Now comes the decision that quietly determines how much money you actually make: where you sell it.
Put your course on a marketplace like Udemy and you can hand over up to 63% of every sale. Sell it from your own WordPress site instead, and your costs are a few dollars of hosting plus standard card processing. On a $100 course, that’s the difference between keeping $37 and keeping about $97.
This guide walks you through how to sell online courses from your own website. We’ll do the fee math with real numbers, pick a pricing model, connect payment methods, set up checkout, and plan a simple launch with coupons. One thing it won’t cover is building the course itself: we already have a step-by-step guide to creating an online course with WordPress. This one is all about the money side.
Let’s jump right in!
Step 1: Decide where you’ll sell
There are three realistic places to sell a course:
- A marketplace like Udemy. They bring the audience, you bring the course, they take a hefty cut.
- A hosted course platform like Teachable. They handle the tech for a monthly fee, plus a transaction fee on the cheaper plans.
- Your own WordPress site with an LMS plugin. You own everything and keep everything, but bringing buyers is entirely on you.
None of these is flat-out wrong. But the costs are wildly different, so let’s put real numbers on it. Say you sell a $100 course 20 times in a month, which works out to $2,000 in gross sales. Here’s roughly what you keep on each setup:
| Where you sell | Fixed monthly cost | Platform’s cut of $2,000 | You keep (before card fees) |
|---|---|---|---|
| Udemy (student finds you on Udemy) | $0 | 63% ($1,260) | ~$740 |
| Udemy (student uses your coupon link) | $0 | 3% ($60) | ~$1,940 |
| Teachable Starter | $29 (billed annually) | 7.5% ($150) | ~$1,821 |
| Your own WordPress site + free LMS | ~$5–10 hosting | $0 | ~$1,990 |
The footnotes matter here, so let’s be precise:
- Udemy’s split is 97% to you when the student buys through your own coupon or referral link, and 37% when they don’t. It’s calculated on the “net amount”: Udemy deducts taxes and app-store fees from the amount before your split, and card processing is on them. One catch: if Udemy runs a site-wide promotion and your course sells at a discount, your 37% shrinks along with the sale price.
- Teachable’s Starter plan is $29/month only when billed annually ($39 month-to-month), and it adds a 7.5% transaction fee on top. The 0%-transaction-fee plans start at $69/month (Builder, annual billing).
- On your own site (and on Teachable, for that matter), card processing still applies: Stripe’s standard rate is 2.9% + 30¢ per successful card charge. On twenty $100 sales that’s about $64, so your real take on your own site is closer to $1,926. Still the best number on the table by a mile.
One more thing the table doesn’t show: ownership. On your own site you set the price, you run the sales, and, most valuable of all, you get every customer’s email address. On a marketplace, the customer belongs to the marketplace: you can only reach your students through the platform’s own messaging, on the platform’s terms. That’s exactly how they keep you dependent on their traffic.
When a marketplace is actually better 🏪
You’d expect a WordPress product company to say “own site, always.” Not quite, because it isn’t true.
- You have no audience and no interest in marketing. Udemy’s marketplace brings shoppers to your course. Your own site brings nobody; every visitor is your job. If writing blog posts and sending emails makes you tired just thinking about it, a marketplace earns its cut.
- You want to validate a topic fast. Publishing on a marketplace takes an afternoon and costs nothing upfront. If nobody buys there, that’s useful data before you sink weeks into your own platform.
- You don’t want to touch tech, refunds, or taxes. On your own site, you’re the store owner and the support desk. Some people would happily trade margin for never seeing a chargeback email. Fair trade.
A common play is to do both: a starter course on Udemy as a discovery funnel, and your premium courses on your own site where you keep the margin. And if you do have an audience (an email list, a YouTube channel, a blog that gets traffic), your own site wins the math every time. On to the setup.
Step 2: Set up WordPress and your LMS
To sell courses from your own website you need three things: hosting, WordPress, and an LMS plugin. LMS stands for Learning Management System, the software that handles your courses, students, and payments. It sounds boring, but it’s useful to know the term.
For hosting, a decent shared plan runs about $5–10 a month. Make sure it includes SSL, the padlock icon that puts your site on https, because you can’t safely take card payments without it. Most hosts bundle it for free these days.
For the LMS, this walkthrough uses our very own Masteriyo.
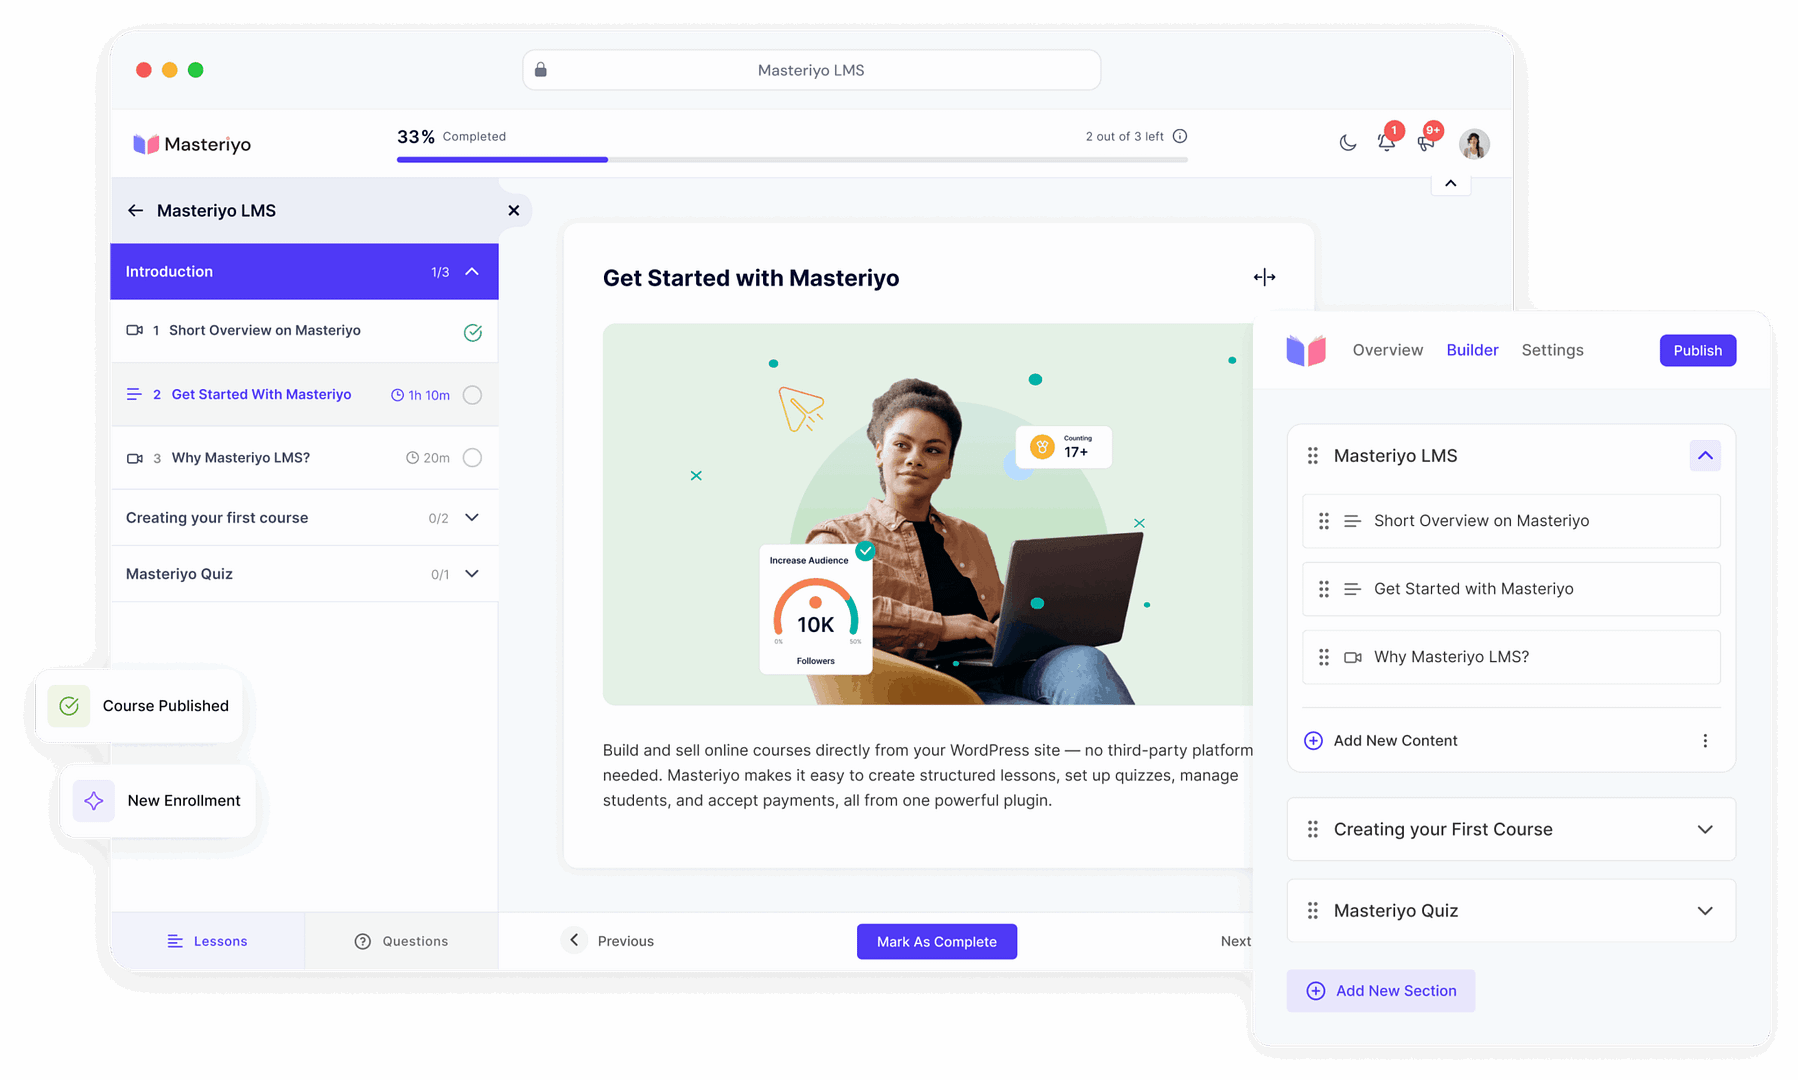
Quick disclosure: Masteriyo is part of the Themeisle family, so we’re hardly neutral here. It made the cut because the free version genuinely lets you sell: PayPal and offline payments are built in, Stripe is a free addon, and there are 0% platform transaction fees. If you’d rather shop around first, we’ve also compared the best free LMS plugins for WordPress.
Install it like any plugin: Plugins → Add New, search “Masteriyo,” install, activate. The setup wizard runs on its own and offers starter templates, complete demo course sites you can import and then swap in your own content:
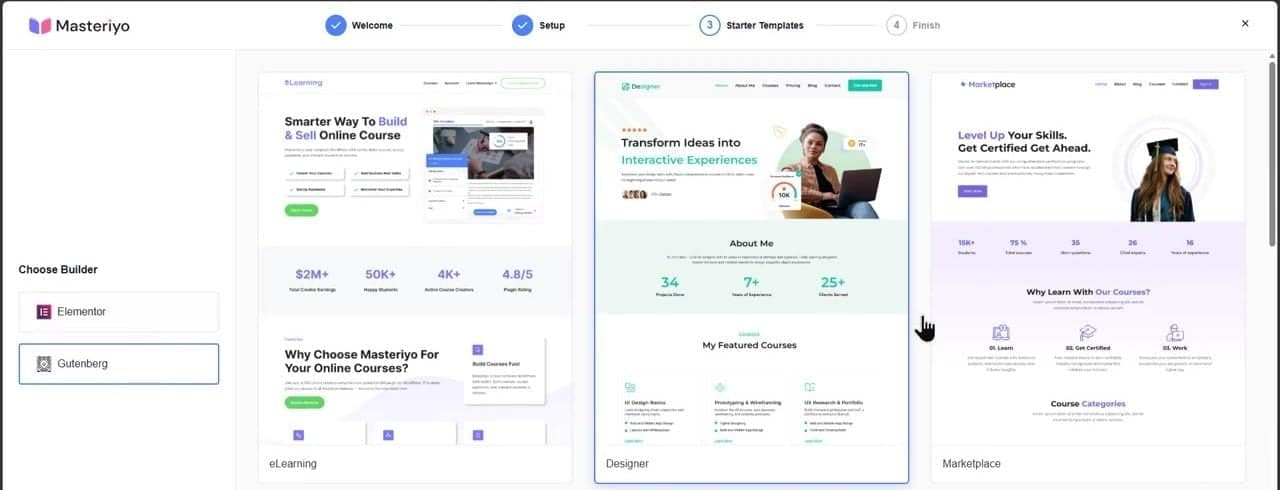
Pick one you like (or skip and design later), and you’re in.
From here, the actual course building (curriculum, lessons, video, quizzes) is its own topic, and as promised we won’t re-teach it here. Work through the course creation guide, and our WordPress LMS guide covers the bigger picture. Come back when your course is ready to sell.
Step 3: Pick a pricing model
Before you touch any settings, decide how you want to charge. Your main options:
- Free course. Sounds pointless in a “make money” tutorial, but it isn’t. A free intro course is the fastest way to build an email list of people who’ll buy the paid one.
- One-time price. The classic. The student pays once and gets access forever (or as long as you allow). Simple to explain, simple to buy, and the best place to start.
- Recurring subscription. Students pay monthly or yearly for continued access. Great for courses you keep updating, or a whole catalog under one membership.
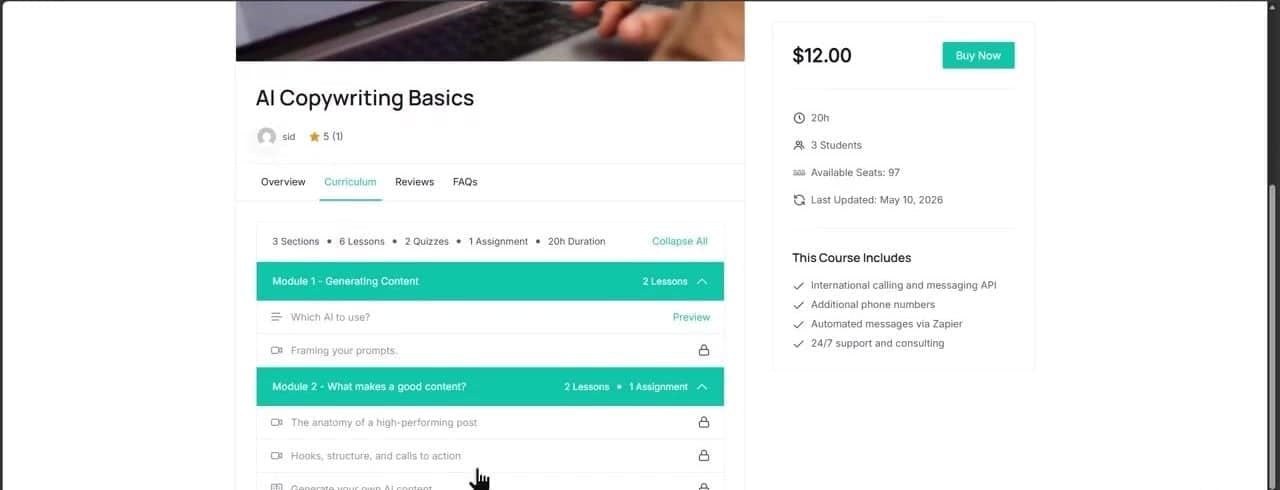
In Masteriyo, pricing lives in the course settings under Masteriyo → Courses → Edit course → Settings → Pricing. Free and one-time pricing work out of the box. Here’s what a paid course page looks like to your visitors, with the price, curriculum, and Buy Now button all in place:
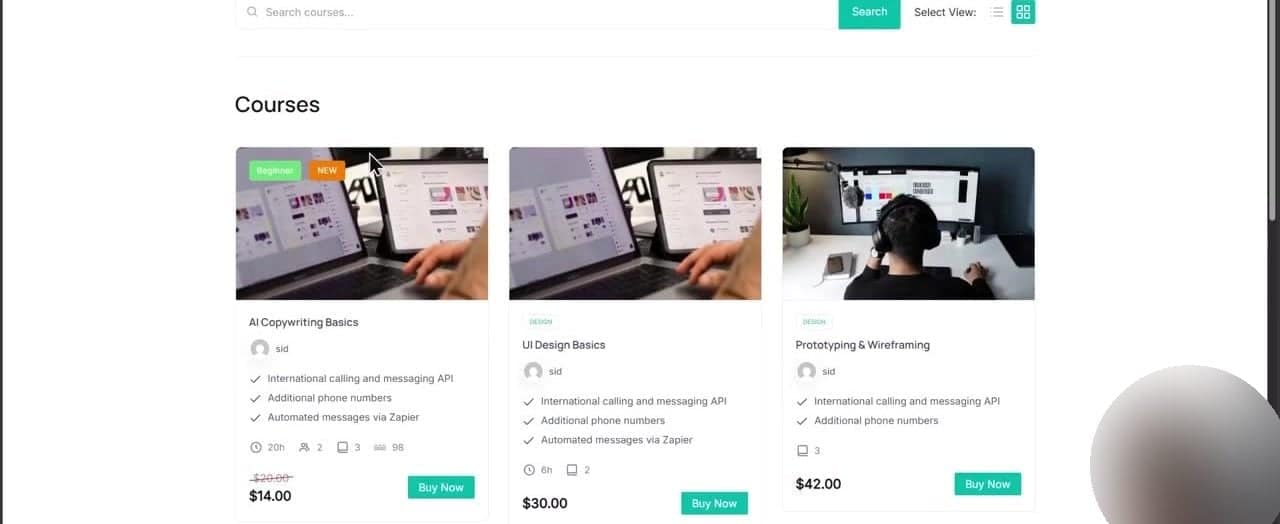
And here’s the courses archive, listing your catalog with prices front and center:
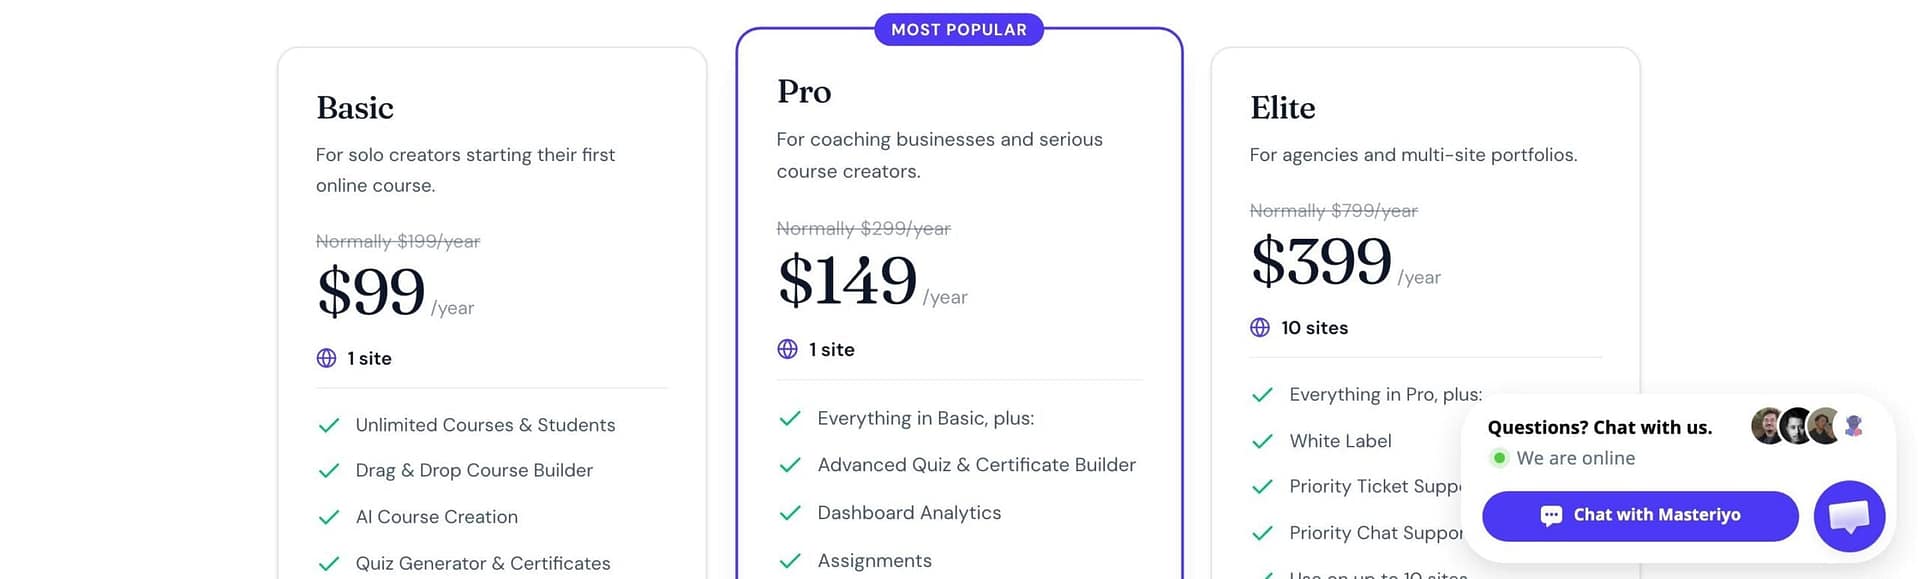
Recurring pricing is a Pro feature, so let’s talk money for a second. Masteriyo’s paid plans start at $99/year (Basic), while Pro at $149/year adds subscriptions, coupons, sale pricing, course bundles, and advanced quiz options. One thing to know before you budget: those are intro prices, and renewals happen at the higher “Normally” rate, $199 and $299 per year respectively.
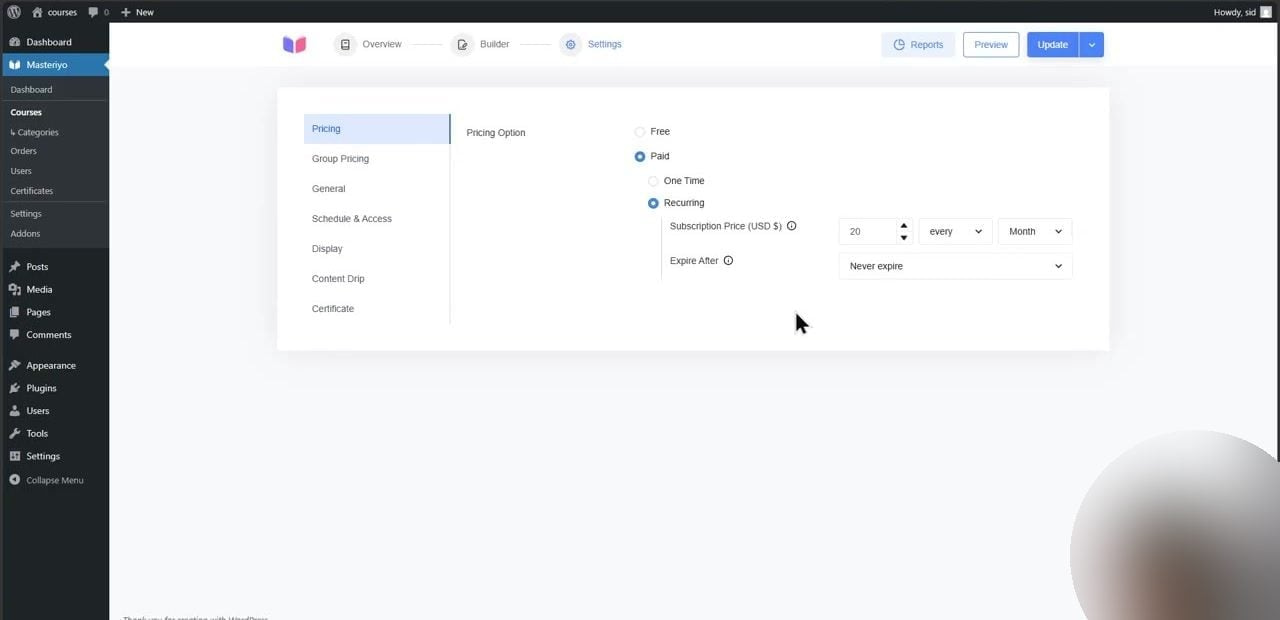
If you do go the subscription route, the settings look like this, with the price, billing cycle, and an optional expiration:
And the actual number on the price tag? The short version: price the outcome, not the video length. A two-hour course that gets someone a promotion is worth more than a twenty-hour one that doesn’t.
🎯 The practical advice: launch with a one-time price first. Subscriptions shine when you have enough content that “keep paying to keep access” feels fair, and they also add churn, failed payments, and renewal questions to your life. Earn the right to be complicated later. If recurring revenue is the goal from day one, our guide to starting a membership site is worth a read.
Step 4: Connect your payment methods
Time to get paid! Head to Masteriyo → Settings → Payments → Payment Methods:
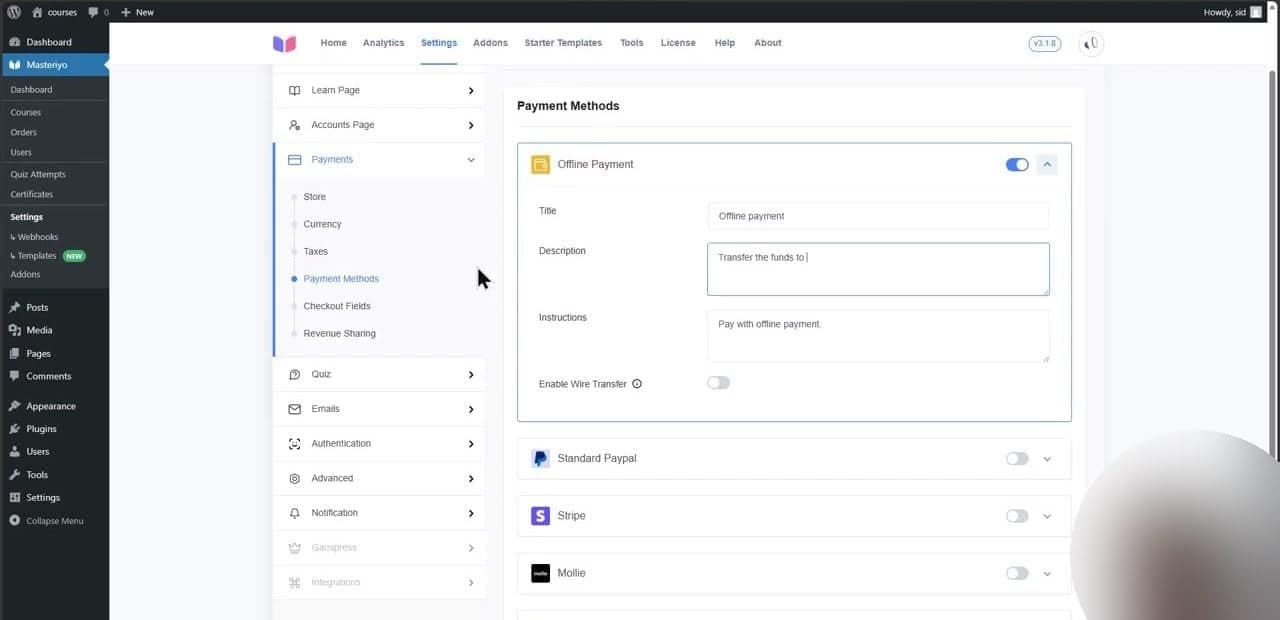
Here’s what you can switch on:
- Offline payment: for bank transfers and corporate clients. Since no money moves online, you mark the order paid yourself once the funds arrive. Built in.
- PayPal: also built into the free plugin. Connect your PayPal account and you’re live.
- Stripe: the one you want for card payments. It’s a free addon: go to
Masteriyo → Addons, enable Stripe, then connect your Stripe account back on this screen.
(Mollie and Lemon Squeezy are free addons too, if those happen to be your gateways of choice.)
What does it cost? Stripe’s standard rate is 2.9% + 30¢ per successful domestic card charge. International cards add 1.5%, and currency conversion adds another 1%. That’s the entire cost of selling on the free Masteriyo plan, since there’s no platform fee stacked on top. PayPal charges its own processing fees, so check their site for current rates.
💡 PRO TIP: If you use a caching plugin, exclude your checkout, account, and learn pages from the cache. Cached checkout pages cause weird, hard-to-debug errors, like prices that won’t update and orders that vanish. Five minutes of setup saves you a support headache later.
Step 5: Set up checkout and get paid
Here’s the best part of the own-site route: Masteriyo builds the checkout page for you. No WooCommerce required, no cart plugin, no extra extensions. When a student hits Buy Now, they land on a checkout page with their order summary, a coupon field, and whatever payment methods you enabled:
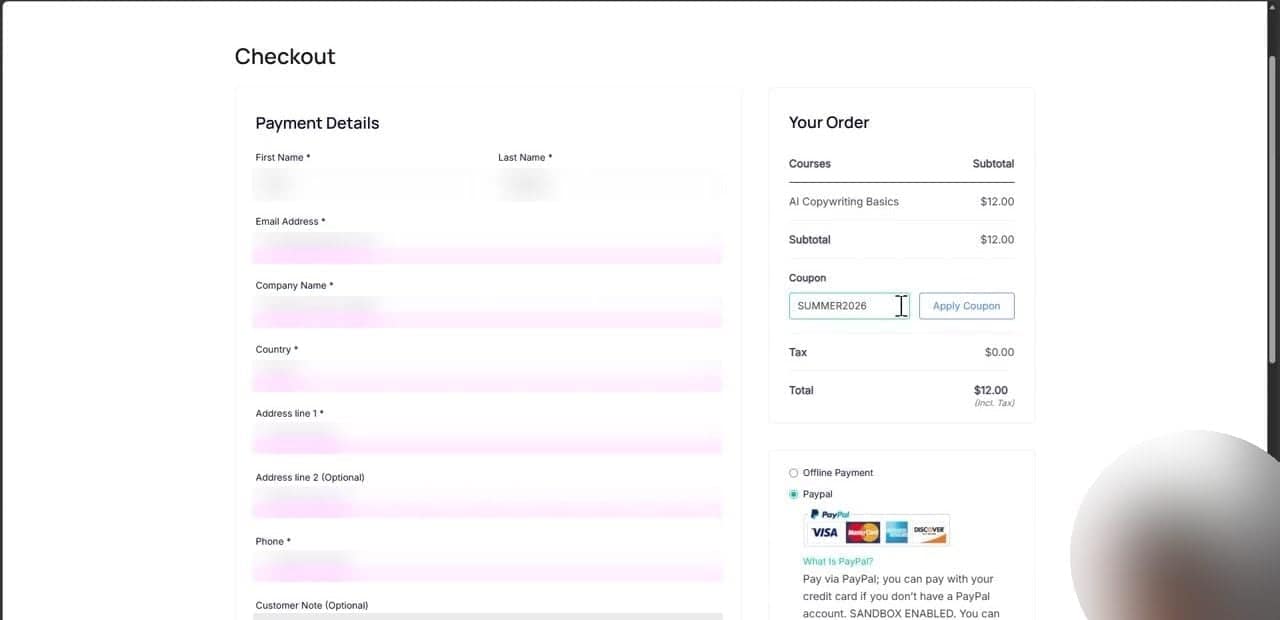
They pay, an account is created for them, and they’re enrolled automatically. Done and done.
Before you announce anything, buy your own course. Run a real $1 test purchase (or use your gateway’s sandbox mode) and walk the whole flow as a student: checkout, confirmation email, login, course access. It takes ten minutes and catches the embarrassing stuff, like a broken email or a wrong price, before your buyers do.
Now the money. Because the gateways are yours, the money is yours from the very first sale. Stripe collects the payment and pays out to your bank on a rolling schedule. No waiting for a marketplace’s monthly payout cycle, no minimum threshold, nobody holding your revenue for you.
Two more admin bits worth knowing:
- Taxes: there’s a Taxes section under the same Payments settings if you need to charge sales tax or VAT. Whether you need to is a question for an accountant, so seriously, ask one. 🧾
- Refunds: you set the policy, and you process refunds through Stripe or PayPal. A 14- or 30-day no-questions refund window is standard in the course world, and it takes most of the risk out of buying.
And yes, being the store owner means the occasional “I can’t log in” email lands in your inbox instead of someone else’s support queue. That’s the real cost of the 0% platform fee, and for most course sellers it’s a good trade. Just go in with eyes open.
One more scenario: already running WooCommerce? Masteriyo integrates with it for free, so courses can live alongside your other products. For a courses-only store, though, the built-in checkout above is simpler, so only add WooCommerce if you need its specific gateways or extensions.
Step 6: Launch with coupons and discounts
Don’t just publish your course and hope. Give it a launch: a defined window where something special happens. Coupons are the classic tool for this, and they’re a Pro feature in Masteriyo: $149/year at the intro price, renewing at the $299 “Normally” rate. Factor that into your first-year math.
Creating one takes about a minute. Go to Masteriyo → Coupons → Add New, then set the code, the discount type and amount, which courses it applies to, whether it stacks with other coupons, and usage limits:
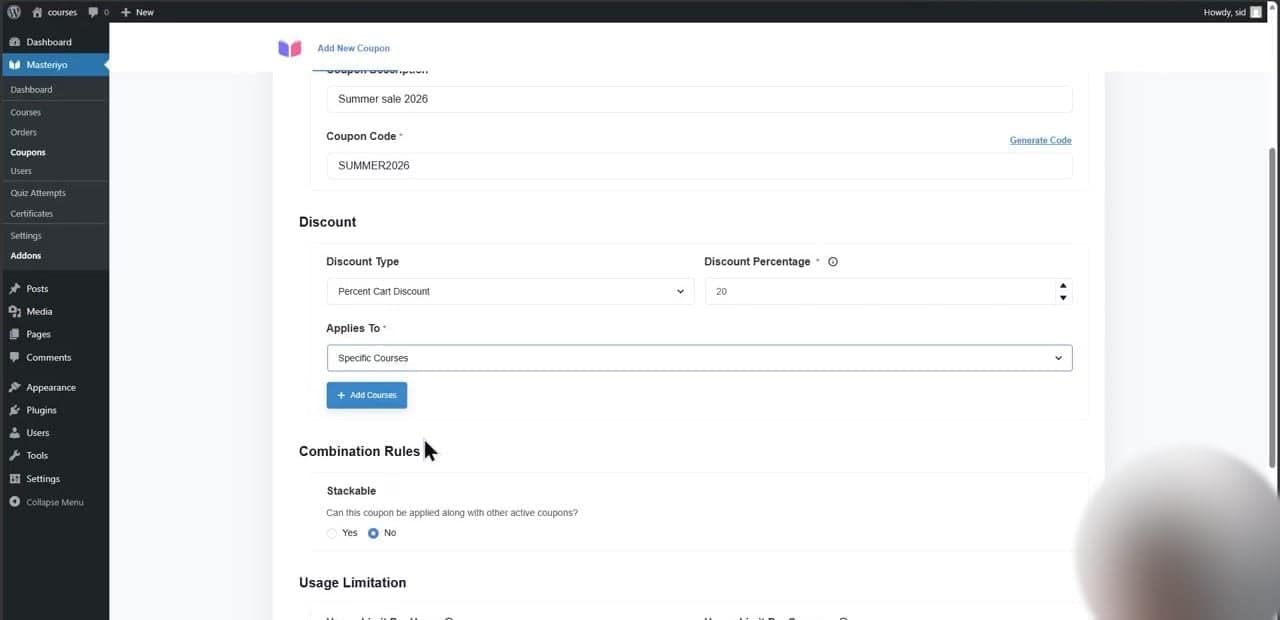
A launch playbook that works well:
- Build a small waitlist first. Even 50 emails is enough. A free mini-course or a simple “notify me” signup form gets you there.
- Offer early-bird pricing for 72 hours. A real discount of 20 to 30%, with a real end date. The deadline does the selling: “20% off until Friday” beats “great course, please buy” every time. ⏳
- Cap the coupon if you want scarcity. A usage limit of 25 codes creates honest urgency, no fake countdown timers required.
- Then stop. Perpetual discounts train your audience to never pay full price. When the window closes, close it.
On the free plan without coupons? You can still run a launch: set a lower one-time price for launch week, announce it to your list, then raise it to the real price afterward. Slightly more manual, same effect.
Final thoughts
Let’s recap the whole thing:
- Marketplaces bring buyers but take up to 63% of each sale; your own site costs hosting plus ~2.9% + 30¢ in card processing.
- WordPress + a free LMS like Masteriyo + Stripe is the cheapest setup on that table, and it stays cheap as your sales grow.
- Start with a one-time price; add subscriptions (Pro) when your catalog earns them.
- Launch with a real early-bird coupon window, then go back to full price.
The bottom line: if you have any audience at all, or you’re willing to build one, sell from your own website. The math isn’t close, and you own the customer relationship, which matters more than any single sale. If you have zero audience and zero interest in marketing, start on a marketplace to validate your topic, then move.
Either way, the setup above takes an afternoon. The rest is up to you.
Have questions about selling courses from your own website? Or a marketplace fee horror story to share? Let us know in the comments section below! 💬

FREE GUIDE
4 Essential Steps to Speed Up Your WordPress Website
Follow the simple steps in our 4-part mini series and reduce your loading times by 50-80%. 🚀
Yay! 🎉 You made it to the end of the article!