
An abandoned plugin on your site is a ticking clock. The original developer has moved on, security patches won’t come, and eventually it’ll break against newer WordPress versions. You need a plan that doesn’t involve panic.
Abandoned plugins create a real security debt over time
When a plugin isn’t maintained, it’s not just sitting there harmlessly. WordPress itself updates constantly—new versions, new PHP requirements, new security standards. Your unmaintained plugin gets further out of step with each update. Vulnerabilities discovered after the developer disappears will never be patched. That’s the gap where attackers work.
The longer you wait, the worse your options become. A plugin abandoned six months ago is fixable. A plugin abandoned three years ago is a liability. You’ll either need to replace it, find someone to maintain it, or live with the security risk. None of those are painless, which is why you need to act before you’re forced to.
Check whether the plugin is truly dead or just quiet
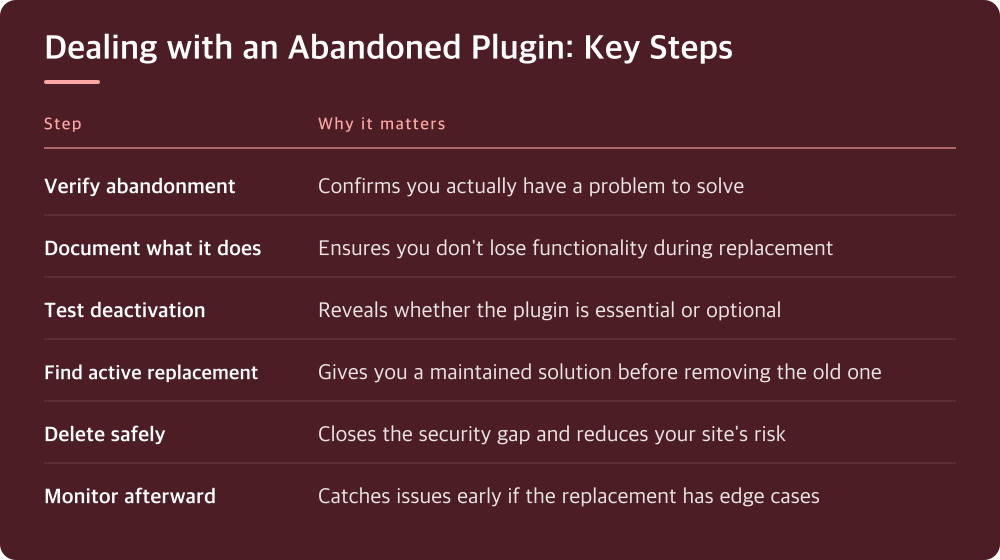
Before you pull the trigger, verify the plugin actually is abandoned. Sometimes developers go quiet for months but come back. Log into WordPress.org and search for the plugin by name. Look at the ‘Last updated’ date—if it’s more than a year old and the WordPress version compatibility stops well below your current version, that’s a strong signal. Check the plugin’s support forums or GitHub repository if it has one. Look for recent issues that haven’t been addressed.
Also check the plugin settings itself. Some plugins log their version number. If your installed version is drastically older than what you remember, the developer probably stopped updating it long ago. Read the support forum threads carefully—other users will have already complained about compatibility issues with recent WordPress versions, and you’ll see whether anyone’s responded.
Document exactly what the plugin does before you replace it
This matters more than it sounds. You need to know every function it handles, every setting it controls, and what data it stores. Open the plugin settings page and take screenshots of every tab and option. Check your WordPress dashboard for any widgets or menu items it added. Search your posts and pages for any shortcodes the plugin uses. Look at the database if you can—the plugin may be storing custom post types or custom fields you didn’t realize.
Write this down in a text document or spreadsheet. Note the plugin name, what it does, and the specific settings you’ve configured. This becomes your spec sheet when you’re hunting for a replacement. You don’t want to discover six months later that the old plugin was doing something critical that the replacement doesn’t.
If the plugin handles something unique that few other plugins tackle, you’ll need to evaluate whether a replacement exists before you uninstall the old one. Running both temporarily is often smarter than removing it first.
Deactivate and test before you delete anything
Your first move is to deactivate the plugin, not delete it. After deactivation, visit every part of your site that the plugin affects. Check the frontend, check the dashboard, load pages in different browsers if you can. Look for broken layouts, missing functionality, error messages. This is your reality check—does your site actually break without it, or does it just lose a feature you don’t actually need?
If the site holds up fine without it, you’ve learned something valuable. You might be able to just leave it deactivated and disabled permanently. If things break immediately, you know a replacement is genuinely necessary, not optional.
Keep the plugin deactivated for at least a few days if possible. Sometimes issues emerge slowly as visitors interact with the site. Once you’re confident nothing’s broken, you can delete it safely. If something does break during the test period, reactivate it and move to finding a replacement while it’s still functional.
Find a maintained alternative that does the same work
Search the WordPress plugin directory for alternatives. Look for plugins that are actively maintained—recent updates, active support threads, good reviews from recent users. Read the reviews specifically for comments about compatibility with your current WordPress version. Some popular plugins that stopped being maintained have spawned community-maintained forks. Check GitHub and the plugin directory listings for those.
Test the replacement plugin on a staging environment before your live site if you have one. A staging site is a copy of your real site where you can experiment safely. This costs extra—check whether your hosting provider offers it. If they do, this is one of the few things worth paying for. Load the replacement plugin, configure it to match your old settings, and verify it produces the same results.
If you don’t have staging, the second-best approach is to install the replacement on your live site while the old plugin is still active. Configure the new one, compare the output, then deactivate and delete the old one. This is riskier but workable if you’re careful and you’ve backed up first.
Delete the abandoned plugin and monitor what comes next
Once you’re running a maintained replacement and you’ve tested it thoroughly, delete the old plugin through the WordPress dashboard. Go to Plugins > Installed Plugins, find it in the list, and click Delete. WordPress will remove the plugin files.
But deletion isn’t the end of your work. For the next two weeks, check your site regularly. Visit different pages, test forms if they exist, check that data is displaying correctly. Log into the dashboard and verify that all your admin pages load without warnings or errors. If the replacement plugin needs any tweaks to match the old behavior, this is when you’ll catch it.
After two weeks of stability, you’re done. Mark the abandoned plugin as resolved in whatever system you use to track site maintenance. But keep this lesson in mind: monitor your plugins for updates. Set a calendar reminder to check your plugin list quarterly. Finding an abandoned plugin early, before vulnerabilities pile up, is infinitely easier than the scramble you’re doing now.
Start with these actions today
You don’t need to finish this today, but you need to start. The first step is confirming the plugin is genuinely abandoned and understanding what it does. Write down those details. Then search for a replacement or decide whether you actually need the functionality at all. Set aside time this week to test deactivation. This isn’t an emergency that requires a frantic fix—it’s a problem that requires a thoughtful approach. But it does require you to move.
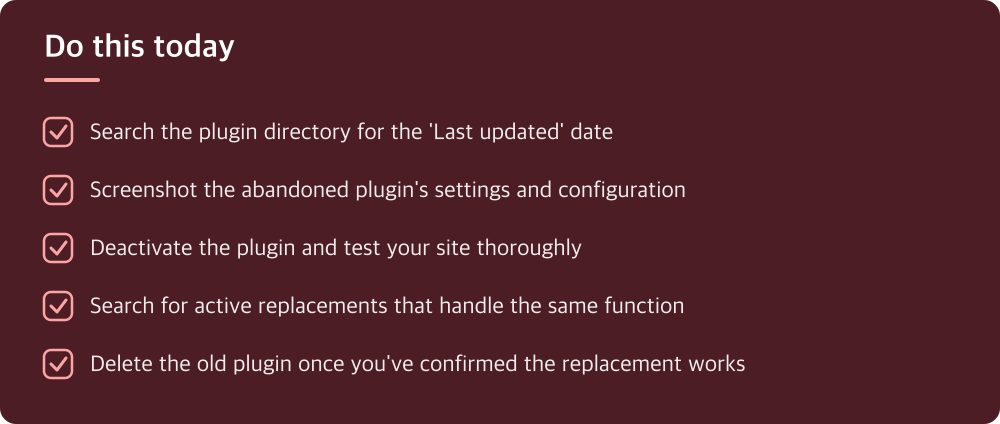
Do this today
- Search the plugin directory for the ‘Last updated’ date
- Screenshot the abandoned plugin’s settings and configuration
- Deactivate the plugin and test your site thoroughly
- Search for active replacements that handle the same function
- Delete the old plugin once you’ve confirmed the replacement works
※ This is informational and not a recommendation of any specific product or company.